The team here at Sparkjoy Studios has been working on making your website even more secure by replacing email addresses in your site content with a secure contact form.
Many contact pages list email address directly on the page, which is great for the user because it’s easy to find. Unfortunately, it’s also easy for spammers to find and harvest that same address and sell it as part of a mailing list, or use it to send spam directly to the address – and really, how much does anyone enjoy emails for great deals on fake Rolex watches, or basketball shoes?
In order to thwart spammers, we’ve replaced those email addresses with a secure form that makes it easy for users to contact you, but leaves spammers out in the cold. Here’s where to find it, and how it works:
View contact forms
This page will show you all the forms – active and inactive – for your website.
- Log in to your website’s Dashboard.
- Choose Forms.
Edit a contact form
Editing a contact form gives you the option of adding, removing, or reordering form fields.
- Log in to your website’s Dashboard.
- Choose Forms.
- Click the title of the form, OR mouseover the title, and choose Edit.

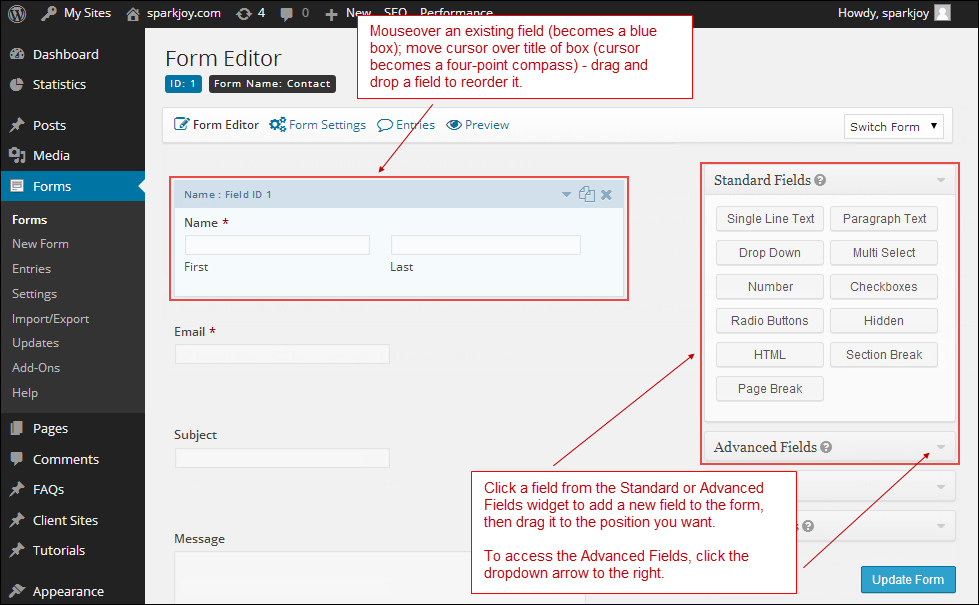
Forms are made up of fields (name, email address, etc.) that users fill in and submit. Add new form fields, or rearrange existing fields, by dragging and dropping fields in the form (on the left), or choosing a new field from the Standard or Advanced Fields widget (on the right).
Add a new field
- Click on a field from the Standard or Advanced Fields widget.
- Field is added to bottom of form by default.
- Drag and drop field to preferred order.

Edit form field
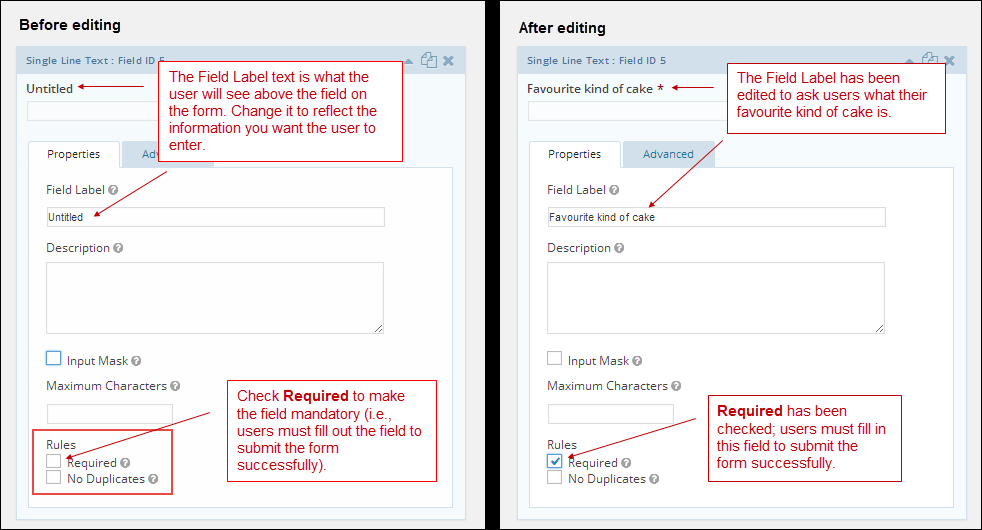
You can specify the text and behaviour of a given field. Most commonly, you’ll want to change the Field Name and, possibly, to make the field a required one under Rules.
- Click on the field you want to edit.
This opens up to show two tabs related to the field: Properties and Advanced. You’ll generally only need the Properties tab which contains the most commonly used options:- Field Label: this is the text the user will see above the field on the form.
- Rules: check this box to make the field mandatory (form cannot be submitted unless the required field is filled out).
- Name, or rename, the Field Label.
- Check Required if you want the field to be mandatory.
- Update Form.

Send user a confirmation
Gravity Forms are set up to send the user an email to confirm that the form they filled out was successfully submitted and received.
- Choose Forms.
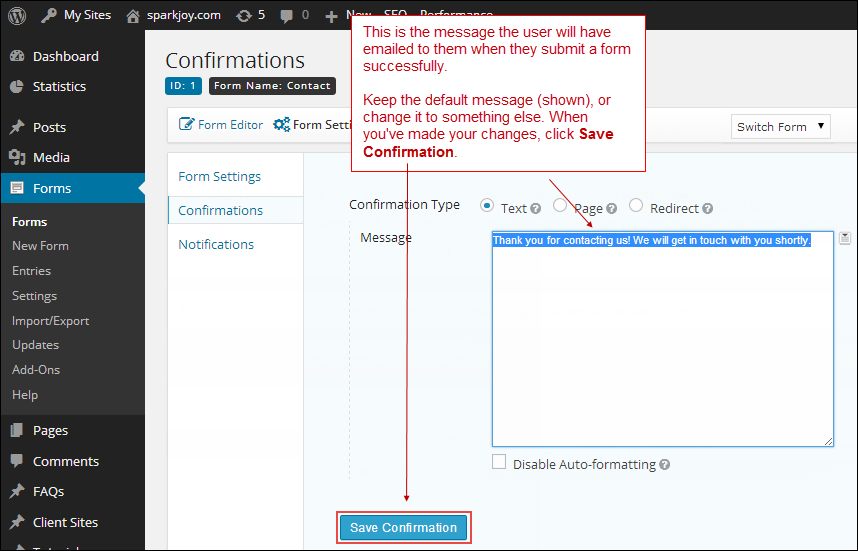
- Mouseover title of form and choose Settings > Confirmations.
- Click the title of the Confirmations form you want to edit.
NB: The form comes with a default message of “Thank you for contacting us! We will get in touch with you shortly.” It can be edited to anything you want. - Type in the message you’d like users to receive when they’ve submitted the form successfully.
- Save Confirmation.

Get notified by email when a form is submitted
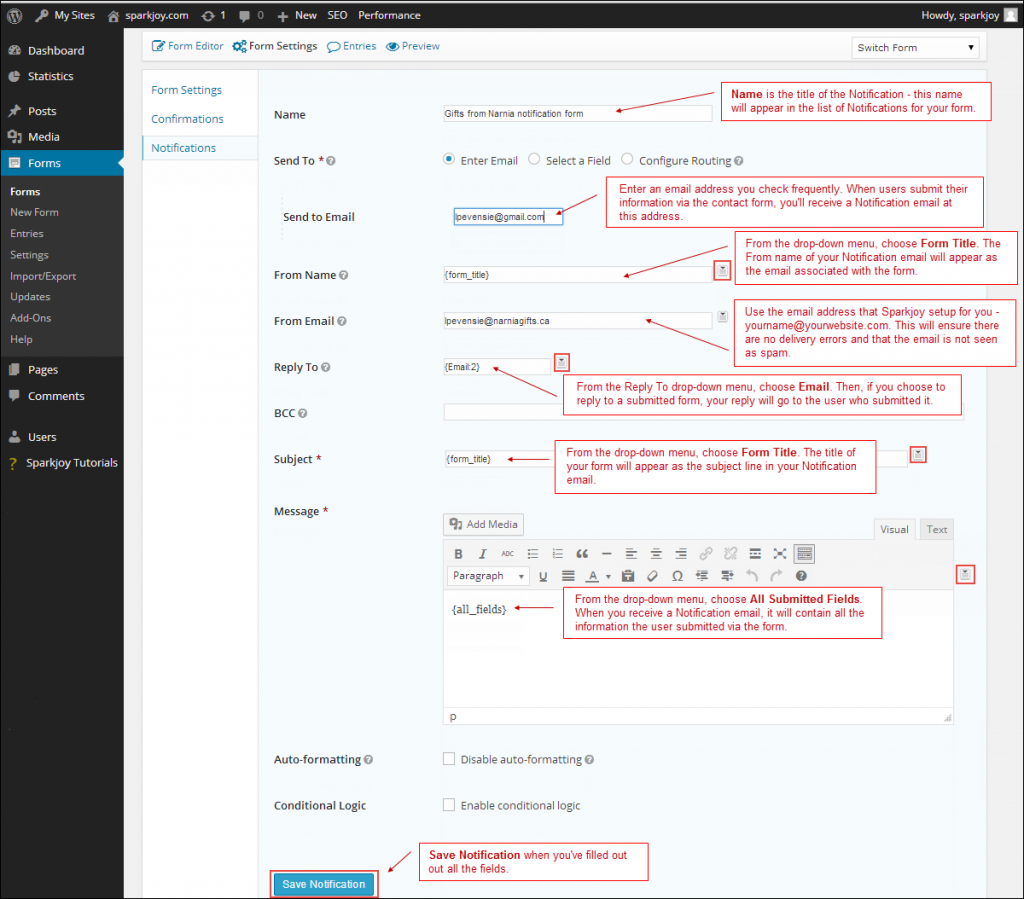
Set your form to notify you by email whenever a new contact form is submitted.
NB: When you create a new contact form, a Notification form is automatically created for you; edit the Notification form to suit your needs.
- Choose Forms.
- Choose the form whose Notifications you want to set up or edit.
- From the Form Settings menu, choose Notifications – OR– ,
- Choose Add New to create a new or additional Notification.


