Posts (and Pages) is where the majority of the content on your site will be.
Content is created in an editor known as the ‘What You See Is What You Get’ editor, also affectionately known as the WYSIWYG (pronounced ‘whizzy-wig’).
Please note that the Cascading Style Sheets (CSS) for your site are only applied to content once the content is published. CSS will not show in the WYSIWYG.
Create a new Post
- Log in to your website.
- From the Main Navigation menu, choose Posts > Add New.

- The following screen will appear:

This is the WYSIWYG editor. There are several features here that give you full control over your content.
- Add photos, videos or audio files.
- Add special characters (accents and symbols).
- Choose when to publish a file (immediately or in the future).
- Choose who can see a post (for your eyes only, password protected for select visitors, or public).
- Categorise and tag posts.
- Create post specific SEO.
Add post content
- Now that you’ve got the WYSIWYG editor open, type all your content into the big white box.
- Click Save Draft (this saves your work, so Save Draft often).
- Click Preview to see what it will look like on your site when it’s published.
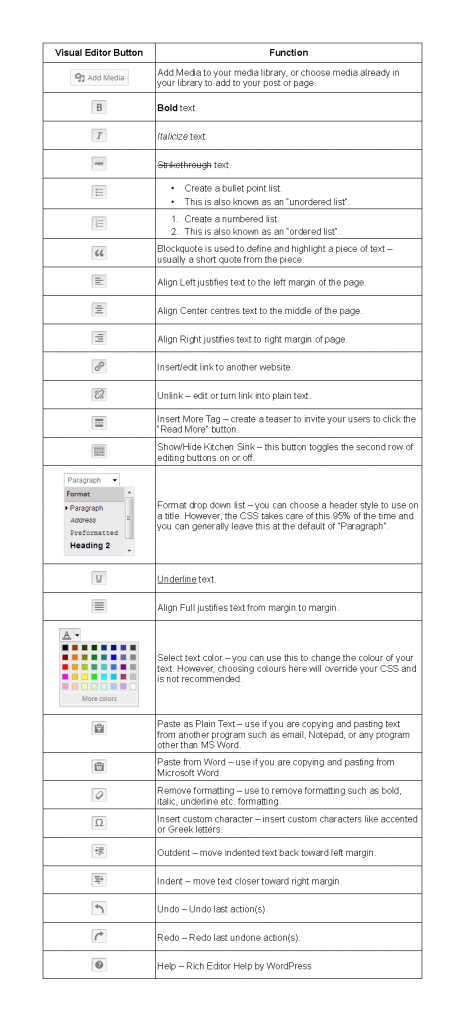
What are all those buttons above the editor for?
The buttons above the editor are for formatting your content, and adding media files. Here’s an overview of each button.


