Featured Image – which used to be known as a “post thumbnail” – is a unique custom image for WordPress posts and pages.
Ideally, the featured image should reflect the content, or general idea, of your post. In the example below, the author has written a post regarding a lengthy absence from blogging. As a way to catch reader’s attention, the author used a photo of a PC covered in cobwebs. The image reflects the ideas in the post and gives the reader an idea of the content without ever having to read the post.

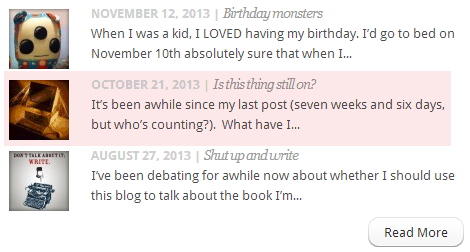
On the author’s home page, the Featured Image, the post title, and a little of the opening text shows – this is another place where the Featured Image helps give the reader a fairly good idea of what the post is about:

Add a Featured Image
- Log in to your Word Press site.
- Choose Posts > Add New.
- From the Featured Image widget on the right, click Set featured image.
- Choose an existing image, or upload a new image.
- Fill in the Attachment Details.
- Set featured image.
Remove a Featured Image
- Log in to your Word Press site.
- Choose Posts.
- Open the post whose Featured Image you want to remove.
- From the Featured Image widget on the right, click Remove featured image.
Edit a Featured Image
- Log in to your Word Press site.
- Choose Posts.
- Open the post whose Featured Image you want to edit.
- Click the featured image.
- Edit the Attachment Details or, click Edit Image in the Attachment Details window to edit the image itself.
Q&A
Q: Why does my Featured Image appear cropped/cut off?
A: Featured Images have a set size that depend on the settings of your site’s theme. For instance, if your theme instructs Featured Image/thumbnails to display as 300 x 100 pixels, any photo you upload with larger dimensions will be cropped across the centre as a 300 x 100 pixel photo. This can result in photos looking less than ideal.
You may need to crop or resize the photo prior to uploading it to your Media Library, or you can request that the size restrictions be removed from the theme.
NB: removing the sizing restrictions will likely result in photos of a non-uniform size which can, in some cases, affect the look and feel of a site.
Q: How do I find out how big the image I want to use is?
A: There are a couple of the methods you can use to figure out how big your image is:
- If the image is saved to your PC, and you haven’t uploaded it yet, you can ‘hover’ the cursor over the photo and it will tell you the dimensions (usually measured in pixels).
- If you’ve uploaded the image to the Media Library for your site…
- Choose Media > Library.
- Click on the photo you want to know the dimensions of.
- In the “Save” widget on the right, the dimensions are listed at the bottom in pixels.


